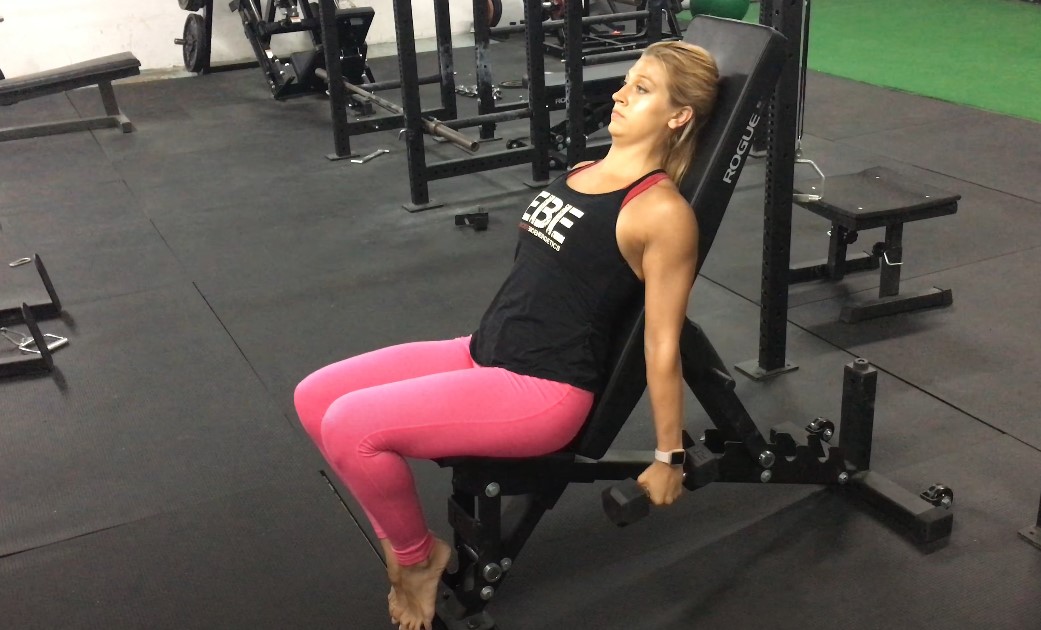
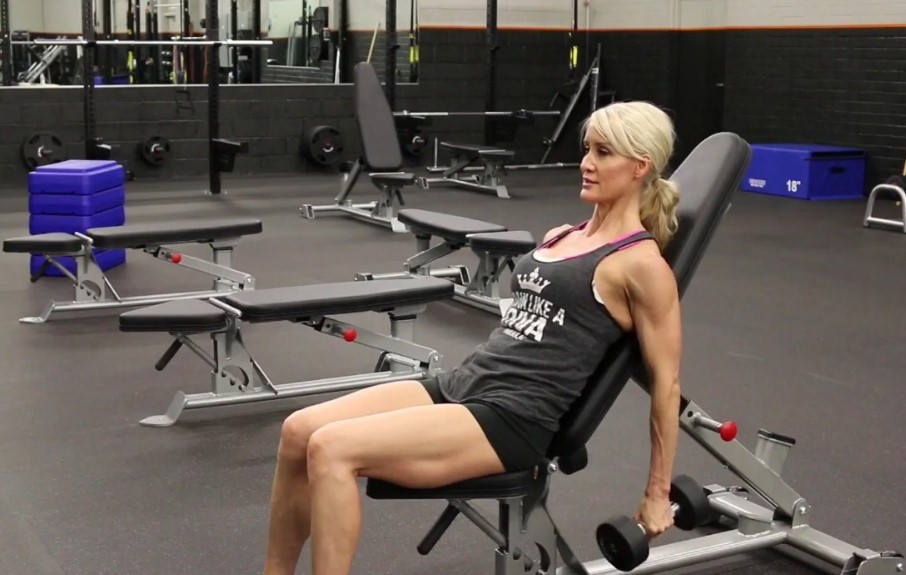
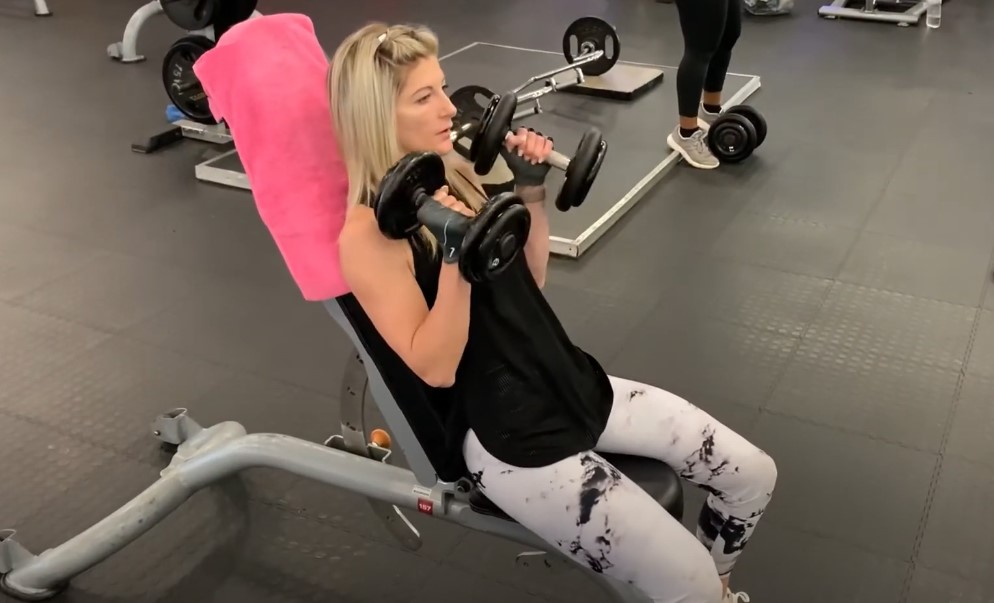
When
it
comes
to
arm
training,
the
usual
suspects
like
bicep
curls
and
tricep
dips
often
steal
the
spotlight.
But
if
you’re
looking
to
build
serious
strength,
improve
muscle
definition,
and
add
a
new
dimension
to
your
arm
workouts,
it’s
time
to
turn
your
attention
to
a
less
celebrated
yet
incredibly
effective
exercise:
the incline
hammer
curl.
In
this
guide,
we’re
going
to
break
down
everything
you
need
to
know
about
this
exercise—from
why
it’s
so
effective
to
how
you
can
integrate
it
into
your
routine.
What
Makes
the
Incline
Hammer
Curl
Unique?

The
incline
hammer
curl
isn’t
just
a
twist
on
the
regular
hammer
curl;
it’s
a
serious
upgrade.
When
you
do
this
exercise
on
an
incline
bench,
you
shift
the
angle
of
your
arms,
which
changes
how
your
muscles
work.
While
the
classic
hammer
curl
mainly
focuses
on
the
brachialis
and
biceps,
the
incline
version
really
kicks
in
the
brachioradialis,
an
important
forearm
muscle
that
helps
add
thickness
to
your
arms.
Extended
Range
of
Motion
Another
standout
feature
of
the
incline
hammer
curl
is
its
ability
to
stretch
your
muscles
through
a
greater
range
of
motion.
The
incline
position
forces
your
arms
behind
your
body,
providing
a
deep
stretch
at
the
bottom
of
the
movement
that
you
simply
don’t
get
with
traditional
curls.
This
extended
range
not
only
helps
with
muscle
growth
but
also
improves
flexibility
and
joint
health.
Emphasis
on
Form
and
Control
Because
the
incline
hammer
curl
limits
the
use
of
momentum,
it
forces
you
to
focus
on
proper
form
and
muscle
control.
This
means
more
muscle
activation
and
a
reduced
risk
of
injury-key
benefits
that
make
this
exercise
a
must-have
in
any
serious
arm
workout
routine.
How
to
Perform
the
Exercise
To
get
the
most
out
of
incline
hammer
curls,
you
need
to
start
with
the
right
setup.
Here’s
how
to
do
it:
-
Adjust
the
Bench: Set
your
incline
bench
to
a
45
to
60-degree
angle.
The
steeper
the
angle,
the
more
challenging
the
exercise
becomes,
so
choose
a
setting
that
aligns
with
your
fitness
level. -
Choose
Your
Weights
Wisely: This
exercise
emphasizes
control,
so
select
dumbbells
that
allow
you
to
perform
the
movement
with
perfect
form.
It’s
better
to
start
light
and
gradually
increase
the
weight
as
you
become
more
comfortable
with
the
exercise. -
Positioning: Sit
on
the
bench
with
your
back
flat
against
the
pad.
Let
your
arms
hang
straight
down
with
the
dumbbells
in
a
neutral
grip
(palms
facing
each
other).
Your
feet
should
be
firmly
planted
on
the
ground
for
stability.
Now
that
you’re
set-up,
here’s
how
to
execute
the
incline
hammer
curl
with
precision:
-
Slowly
curl
the
dumbbells
up
toward
your
shoulders,
keeping
your
elbows
tucked
in
close
to
your
sides.
Focus
on
squeezing
your
biceps
and
brachialis
as
you
lift. -
At
the
top
of
the
movement,
pause
and
squeeze
the
muscles
for
a
second.
This
is
where
the
real
magic
happens,
as
it
maximizes
muscle
activation. -
Lower
the
dumbbells
back
down
in
a
slow,
controlled
manner.
The
lowering
phase
(eccentric)
is
just
as
important
as
the
lifting
phase
for
building
strength
and
muscle. -
Perform
your
desired
number
of
reps,
maintaining
strict
form
throughout.
If
you
start
to
lose
form,
it’s
a
sign
that
you
might
need
to
lower
the
weight.
Advanced
Techniques
and
Variations
Once
you’ve
mastered
the
basic
incline
hammer
curl,
it’s
time
to
take
things
up
a
notch.
Here
are
some
advanced
techniques
and
variations
to
keep
your
workouts
fresh
and
challenging.
The
Eccentric
Emphasis
To
really
boost
your
strength
gains,
focus
on
the
eccentric
(lowering)
phase
of
the
curl.
Count
to
three
or
four
as
you
lower
the
dumbbells,
resisting
the
pull
of
gravity.
This
technique
not
only
increases
muscle
tension
but
also
enhances
muscle
growth
and
endurance.
Incline
Hammer
Curl
with
a
Twist
For
an
added
challenge,
incorporate
a
twist
at
the
top
of
the
curl.
As
you
reach
the
peak
of
the
movement,
rotate
your
wrists
so
that
your
palms
face
your
shoulders.
This
extra
twist
engages
your
forearms
and
adds
a
new
dimension
to
the
exercise.
Also,
you
can
try
cable
hammer
curls.
Drop
Sets
for
Extra
Burn
To
completely
exhaust
your
muscles,
try
performing
drop
sets.
Start
with
your
usual
weight
and
perform
as
many
reps
as
you
can
with
good
form.
Once
you
reach
failure,
immediately
drop
to
a
lighter
weight
and
continue
the
exercise
without
rest.
This
technique
is
an
excellent
way
to
push
your
muscles
to
their
limit
and
trigger
growth.
Create
a
Balanced
Arm
Workout

Incline
hammer
curls
are
a
powerful
tool,
but
they’re
most
effective
when
used
as
part
of
a
balanced
arm
workout.
Start
with
Compound
Movements
Begin
your
workout
with
compound
exercises
like
chin-ups
or
barbell
rows.
These
moves
engage
multiple
muscle
groups
and
set
the
stage
for
targeted
work.
Move
to
Isolation
Exercises
After
your
compound
lifts,
transition
to
isolation
exercises
like
incline
hammer
curls.
This
is
where
you
can
really
hone
in
on
the
specific
muscles
you
want
to
develop.
Finish
Strong
with
a
Burnout
Set
To
finish
off
your
arm
workout,
consider
a
burnout
set
of
incline
hammer
curls.
This
involves
performing
high-rep
sets
with
a
lighter
weight
to
fully
fatigue
the
muscles.
frequency
with
which
you
incorporate
incline
hammer
curls
into
your
routine
will
depend
on
your
goals:
-
For
Muscle
Growth: Aim
for
3-4
sets
of
8-12
reps,
performed
twice
a
week.
This
rep
range
is
ideal
for
hypertrophy
(muscle
growth). -
For
Strength: If
your
goal
is
to
build
strength,
go
for
4-5
sets
of
4-6
reps
with
a
heavier
weight,
allowing
for
adequate
rest
between
sets. -
For
Endurance: To
improve
muscle
endurance,
use
lighter
weights
and
perform
15-20
reps
per
set,
focusing
on
form
and
control.
Things
You
Might
Be
Doing
Wrong

Even
with
the
best
intentions,
it’s
easy
to
fall
into
bad
habits.
Here
are
some
common
mistakes
people
make
with
incline
hammer
curls
and
how
to
avoid
them:
Using
Too
Much
Weight
One
of
the
biggest
mistakes
is
trying
to
lift
too
heavy.
This
often
leads
to
poor
form
and
reduced
effectiveness.
Remember,
incline
hammer
curls
are
about
control
and
precision,
not
just
brute
strength.
Start
with
a
manageable
weight
and
gradually
increase
it
as
you
improve.
Incorrect
Bench
Angle
If
the
bench
angle
is
too
steep
or
too
shallow,
it
can
change
the
dynamics
of
the
exercise.
Make
sure
your
bench
is
set
at
a
45
to
60-degree
angle
to
properly
target
the
intended
muscles.
Neglecting
the
Eccentric
Phase
Many
lifters
focus
only
on
the
curling
phase
and
neglect
the
lowering
phase.
This
is
a
missed
opportunity
for
growth,
as
the
eccentric
phase
is
crucial
for
building
muscle.
Always
lower
the
weights
in
a
controlled
manner.
Relying
on
Momentum
Swinging
the
weights
or
using
momentum
to
lift
them
reduces
the
effectiveness
of
the
exercise
and
increases
the
risk
of
injury.
Focus
on
slow,
controlled
movements
to
maximize
muscle
engagement.
How
Incline
Hammer
Curls
Benefit
Daily
Life

While
the
gym
is
a
great
place
to
build
muscle,
the
benefits
of
incline
hammer
curls
extend
far
beyond
aesthetics.
Here’s
how
this
exercise
can
improve
your
daily
life:
Enhanced
Grip
Strength
Incline
hammer
curls
are
excellent
for
building
grip
strength,
which
is
crucial
for
everyday
tasks
like
carrying
groceries,
opening
jars,
or
even
playing
sports.
A
strong
grip
also
translates
to
better
performance
in
other
lifts,
such
as
deadlifts
and
pull-ups.
Injury
Prevention
By
strengthening
the
brachialis
and
brachioradialis,
incline
hammer
curls
help
balance
the
muscles
around
your
elbow
joint.
This
can
reduce
the
risk
of
common
injuries
like
tennis
elbow
or
strains
caused
by
repetitive
motions.
Improved
Athletic
Performance
For
athletes,
strong
arms
are
essential.
Whether
you’re
throwing
a
ball,
swinging
a
bat,
or
grappling
on
the
mat,
incline
hammer
curls
can
give
you
the
edge
you
need
by
improving
the
strength
and
endurance
of
your
arm
muscles.
Final
Thoughts
Think
of
it
this
way:
your
arms
do
a
lot
of
heavy
lifting
(literally
and
figuratively)
every
day,
so
why
not
give
them
the
attention
they
deserve?Adding
incline
hammer
curls
to
your
routine
is
just
what
your
muscles
need
to
get
stronger
and
more
defined.
Plus,
it’s
a
great
way
to
mix
things
up
and
keep
your
workouts
interesting.